One of the big frustrations I have with Divi is the lack of any real gallery options, there’s only a grid or carousel. So if your images are in a variety of ratios it just doesn’t cut it.
Thankfully, there is an easy way to add a masonry gallery to any Divi site (or any other theme for that matter, if it doesn’t already have one).
Responsive Lightbox & Gallery
There is a free plugin called “Responsive Lightbox & Gallery” that gives you additional options for adding galleries to your site.

Once installed, this then adds the “Gallery” option to your dashboard menu.
Adding a new gallery
To add a new gallery, you now need to go to your WordPress dashboard and click on Gallery

Once on this page, simply click the Add New button.
Start by giving the gallery a name, this is just so you know what it refers to, so just give it a sensible name for future reference.

Select your images from the media library as usual using the “select images” button

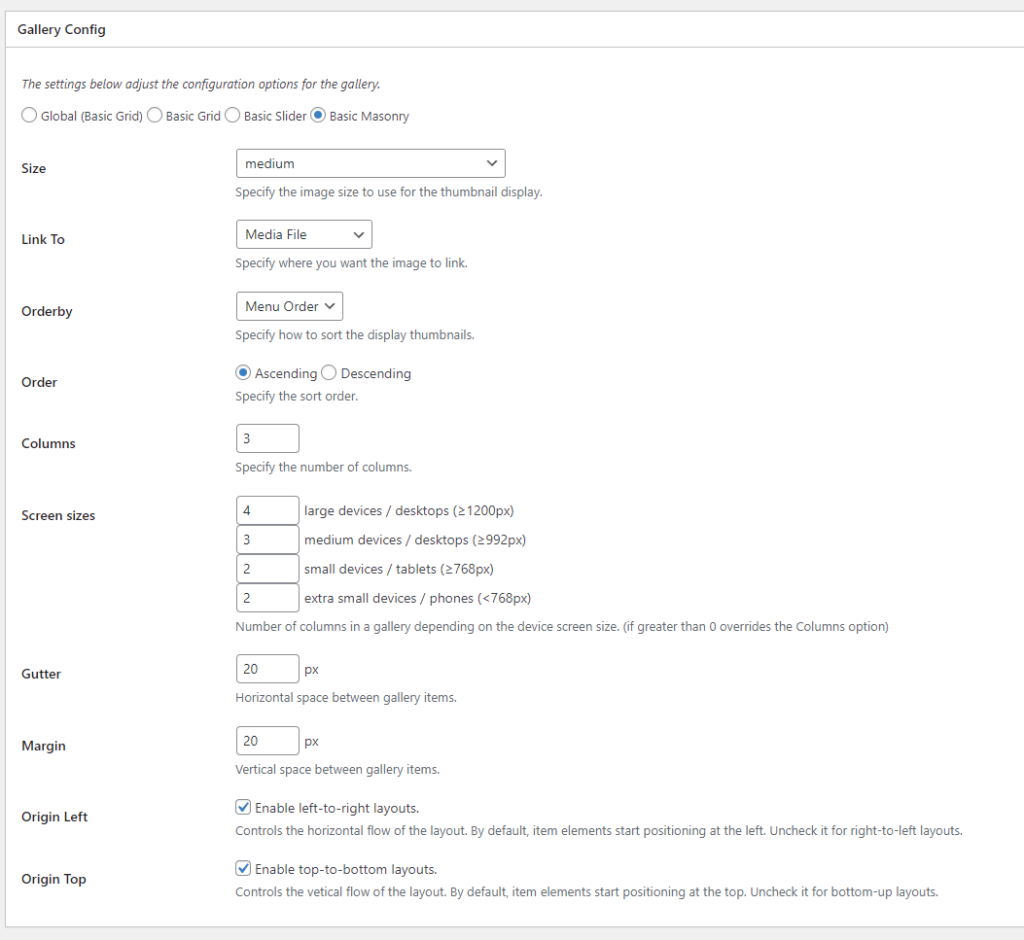
Click on the “Config” tab, and here you can choose the type of gallery you want. Shown below are the options for a Basic Masonry gallery that will work with images of different ratios. You can see in the options it asks for the number of Columns, and also lets you configure the columns per device type too.

Once you’ve chosen your options, click Publish on the top right, and that is your gallery now saved and ready to use.
Adding the gallery to a page
If you go back to the Gallery – All Galleries page, you will see a list of all of the galleries you have created. There is a column titled “Shortcode” that includes a code in some square brackets. Copy and paste this code ready to use on your page.

Open up the page you want to edit in Divi’s Visual Builder, add a text or shortcode block, and simply paste this code into it and your gallery will appear on the page.

Save the page and you’re all done!


0 Comments